Re-Whipping
|
|
- How to Tell if Eggs are Bad (7.21.11)
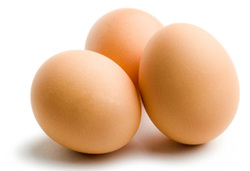
So this morning, I went to make some scrambled eggs, but I realized I haven't been home for about 3 weeks and I wasn't sure if I could trust my carton of eggs. So, I thought I'd share these tips with you for how to determine if an egg is too old WITHOUT having to crack it open! Here's the ol' "egg in water" trick.
-Fill a tall, clear drinking glass with room temperature tap water. Drop an egg into the glass.
- If the egg sinks to the bottom, large side down, the egg is nice and fresh.
- If the egg sinks to the bottom, large side down, but perhaps bobs a little bit, it's about a week older but should still be fine.
- If the egg sinks to the bottom, large side UP, the egg is a bit passed its prime (3 weeks old or so). Not the most dangerous, but will be pale in color and drier in texture if cooked.
- If the egg sinks to the bottom, laying on its side, or floats... stay away, stay away!!!
Hope this helps!
Love,
Crescendough Cakes
- How to Sculpt Rice Krispie Treats (4.9.11)
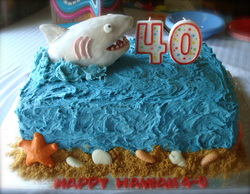
Hey guys! So, I had a cake to do this weekend (my Shark Cake), and it required some Rice Krispie sculpting. Like most amateur cake decorators, I had never done that before. So, I did what research I could online, and kind of mixed and matched different tips for working with this medium; it worked out amazingly on the first try! Here is my technique!!
RICE KRISPIE TREAT RECIPE:
(will make about a loaf pan-sized block of RKT for small - medium characters)
- 1 - 1.5 TBSP unsalted stick butter
- 4 Cups mini marshmallows
- 6 Cups Rice Krispies Cereal
1) In a microwave safe bowl, melt the butter.
2) Measure the 6 cups of Rice Krispies and pour them into a large ziplock bag, making sure the bag is sealed tightly and free of air bubbles. Using a rolling pin or mallet, roughly crush the cereal. Set aside.
3) Once the butter is melted, add the marshmallows and microwave at 30 second increments until just melted (do not burn).
4) With a buttered spatula, stir the butter and marshmallows together. Add the roughly crushed RK's.
5) Gently fold the RKT for 2-5 minutes with your buttered spatula until well combined and the mixture starts to firm up.
PREPARING FOR SCULPTING:
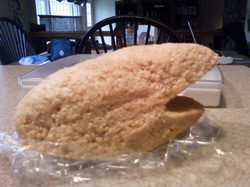
6) While the RKT are still slightly warm, with buttered hands, begin tightly packing the RKT into the general shape of what you will later carve (For my shark, I pressed my RKT into a lined loaf-pan).
7) Once tightly packed in desired shape, refrigerate for several hours to overnight.
8) After chilling, with a small serrated knife, begin carving your desired character.
It's as simple as that! This recipe/technique was the PERFECT consistency. It was stiff enough to hold its shape, pliable enough to patch up mistakes, and held its form perfectly even when covering with buttercream and fondant. Best of all, the left overs were still edible even up to a few days later! ;)
See below for pictures and further tips!
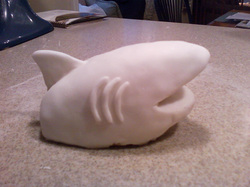
Crumb coat RKT figure with a stiff buttercream. To cover in fondant, I did it in two parts. First, I fitted a piece of fondant inside the mouth, then covered the body in a separate piece. To make the fin, I sculpted it by hand out of a solid piece of fondant and attached it to the body, blending the two pieces of fondant together by applying pressure with my fingers and blending the seams. In a similar fashion, I rolled out some little gills and stuck them to the shark's sides.
To add more detail, I then painted the shark silver (silver luster dust mixed with a few drops of high proof clear alcohol creates a "watercolor"-like paint. A little goes a long way!) and brushed the mouth and gills with pink luster dust paint. To make the teeth, I sculpted tiny fondant teeth and attached them with small dabs of white royal icing.
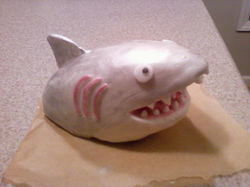
The finished Shark Cake!